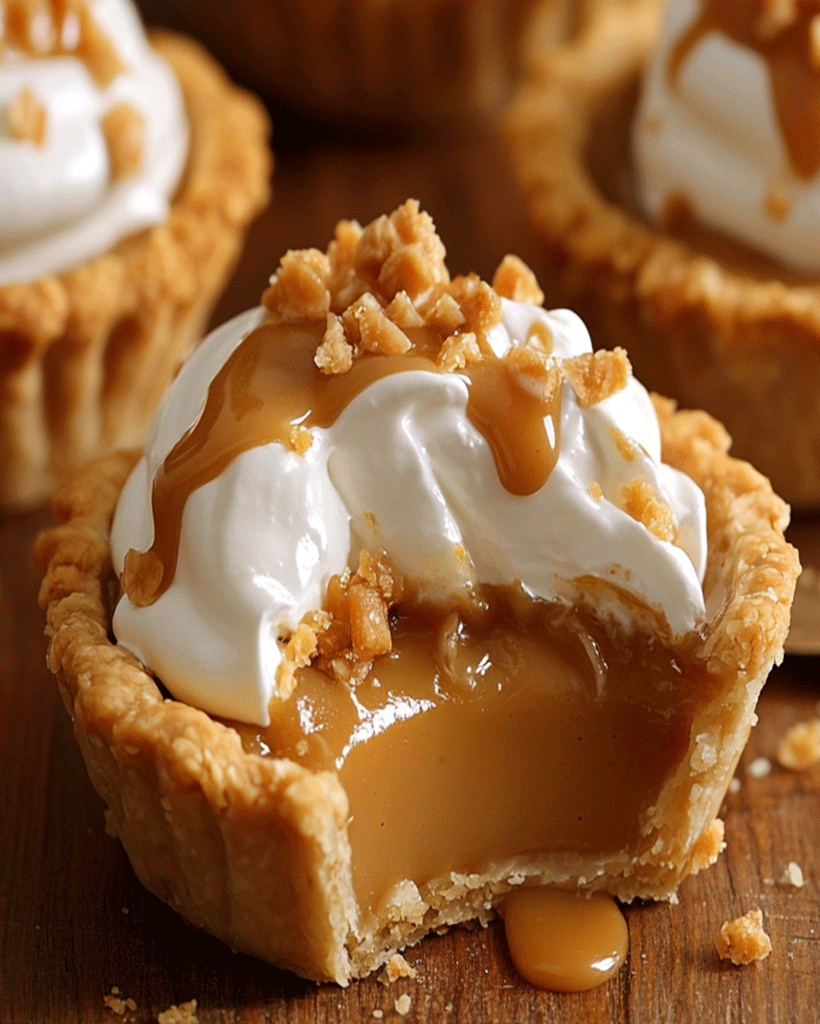
Hey dessert lovers and sweet toothed! If you’re one who enjoys the sweet, rich flavor of butterscotch then you’re going to be in for a treat today. This mini butterscotch tarts are a delicious combination of creamy, buttery filling with a crisp crunchy graham cracker crust which is absolutely delicious. If you’re hosting a party or planning a special occasion, or just craving some sweet treats the delicious tarts will surely impress. This recipe will teach you how to make these easy but delicious mini Butterscotch Cream Tarts that will send your taste buds swaying in delight.
Let’s bake something that is truly delicious!
Introduction
Butterscotch is among the flavors that provide the comfort of every bite. It is often associated to childhood fond memories, sweets as well as homemade desserts. It’s a taste that will never go out of fashion. Mini Butterscotch Tarts elevate this popular flavor to an elegant and tasty bite-sized snack. Ideal for dessert platters for picnics, picnics, or even festive gatherings These tarts blend the sweetness of butterscotch pudding and the silkiness of cream whipped, all wrapped in a crisp Graham cracker crust.
The top aspect? The best part? mini Butterscotch Cream Tart recipe is extremely simple to prepare, using only a few ingredient requirements and with no baking skills needed (apart from quick pie crust!). These aren’t just an amazing dessert, but they also make a stunning method of presenting the sweet treat at your dinner guests.
Ingredients for Mini Butterscotch Tarts
Before you begin ensure that you have the ingredients needed for this recipe of miniature Butterscotch Cream Tarts prepared. The following is what you’ll need in order to make 12 tarts:
- 1 1/2 cup of graham cracker Crumbs for the tart and buttery crust.
- 1/2 cup butter that is unsalted, melting to create a tidbit of a bind and give them a crisp texture.
- 1 bag (3.4 Oz) Instant butterscotch mix It will be the foundation of the creamy rich and creamy filling.
- 2 cups of cold milk to help the pudding mix to activate and give it that smooth texture.
- 1 Cup heavy whipping cream to whip the topping to put over the tarts.
- 2 Tablespoons sugared powder for sweetening the cream that you whip.
- One teaspoon of vanilla extract to improve the flavor of the cream that is whipped.
- Butterscotch sauce to drizzle on top of final tarts for an extra layer of richness.
- Whip cream for topping the tarts.
Substitution Ideas:
- If you’re gluten-free, swap the graham cracker crunch with gluten-free graham crackers, or alternatively, a gluten-free or other cookie.
- To make a dairy-free version utilize coconut milk and a dairy-free whipped topping instead of thick cream as well as milk.
- You can make the caramel sauce in place of butterscotch sauce, if you already have the latter in your pantry!
How to Make Mini Butterscotch Tarts – Step by Step
Once we’ve got every ingredient, we can start baking! This is how to create these wonderful mini butterscotch tarts:
Step 1: Prepare the Crust
The oven should be heated to 350 degrees Fahrenheit (175degC). A mixing bowl mix the graham cracker crumbs with the butter that has been melted. Mix until the crumbs are evenly moistened, and the mixture is able to hold together when you press it.
Step 2: Form the Tart Shells
Spread the graham cracker mixture in the muffin cups or mini tart pans. Utilize the spoon’s back or fingers for pressing the crumbles into the bottom of each cup and up into the cups’ sides until they form the crust.
Step 3: Bake the Crusts
The mini tart pan and muffin tray into the oven to bake in the oven for about 8-10 mins at a time, or until the crusts have a golden brown and have set. After baking, take them out of the oven and allow them to cool completely on an air-tight rack.
Step 4: Prepare the Butterscotch Filling
in a large bowl mix in the butterscotch mix instant with cold milk. Continue to whisk for approximately 2 seconds until the mix becomes thicker. When it is thick, put it in the refrigerator for approximately 10-15 minutes to cool.
Step 5: Make the Whipped Cream
In another bowl, beat in the powdered sugar, heavy whipping cream along with vanilla extract till soft peaks begin to form. It should take around 2 minutes using the aid of an electric mixer. Once the stiff peaks are formed then gently fold the other the cream in half to the cold butterscotch pudding. This gives a soft mousse-like texture.
Step 6: Assemble the Tarts
After the tart shells are completely cool, pour the butterscotch mousse filling in every tart’s shell and then fill up to the top.
Step 7: Add the Final Touches
Decorate each tart with a spoonful of the remaining whipped cream. Drizzle liberally in butterscotch sauce.
Serve immediately or chill until ready to serve.
Helpful Tips for Mini Butterscotch Tarts
Here are some suggestions to make sure the perfect Mini Butterscotch Tarts come out perfect each time:
- Chill the pudding: Allow the butterscotch pudding to cool before mixing it with the whipping cream. This will make a more smooth, fluffy appearance for tarts.
- Crunch Variations If there aren’t any graham crackers on hand, you can try using shortbread cookies that have been crushed and digestive biscuits. Both are great options as crusts.
- Keep the Cream stiff: Make sure your heavy whipping cream is cold prior to whipping it because this helps it achieve stiffer peaks faster.
- Decorated Topping: For a fancier appearance, sprinkle a few of chopped toffee pieces or nuts on top of the whipped cream for extra flavor and texture.
Cooking Tips for the Best Mini Butterscotch Tarts
If you’re looking for the top mini Butterscotch Tarts, here are some suggestions and techniques to enhance your dessert:
- Make use of fresh ingredients: The fresher your ingredients, the better your final product. Utilize freshly-whipped cream and premium butterscotch sauce to create the most memorable taste.
- Chill the Whipped Cream When you’ve whipped it, let it cool for 10 to 15 minutes prior to serving the tarts with it. This will ensure that it stays in its shape when it is served.
- Don’t overfill: When filling the tart shells, take care not to fill them too full. There should be room left for the cream whipped and that butterscotch glaze.
Serving Suggestions for Mini Butterscotch Tarts
This miniature Butterscotch Cream Tarts are delicious enough to stand on their own but if you’d prefer to mix them up with other delectable treats Here are some ideas:
- Fresh Fruit Serving with fresh fruit like strawberries or raspberries to give a refreshing break from the sourness of the tarts.
- Tea or Coffee: Pair with a hot cup of tea or coffee for a warm afternoon treat.
- Ice cream: If you want to add an additional pleasure dessert, serve the tarts with an ice cream scoop made of caramel or vanilla ice cream.
These options can enhance your experience and will add some variety to your dessert menu.
Nutritional Information
Although mini butterscotch tarts are definitely delicious but it’s best to be aware of the nutritional benefits of the treats you love. They are a great source of flavor, but also offer vital nutrients if consumed in moderate amounts.
The butterscotch-rich filling is packed with essential fats derived from heavy cream. Meanwhile, the cracker crust contains some fiber. Be aware of the size of your portions if you’re taking note of your calories.
Nutritional Information (per serving)
Here’s a summary of the nutrition information for a miniature Butterscotch Tart:
- Calories: 310
- Fat: 19g
- Carbohydrates: 34g
- Protein: 2g
- Fiber: 1g
- Sugar: 23g
- Calcium: 40mg
- Iron: 1mg
The information on nutrition is for a single tart and you are at ease to change the portions of your servings as you need to according to your personal goals!
Storage and Leftovers for Mini Butterscotch Tarts
If you have leftovers, keeping those leftovers mini Butterscotch Tarts can be easy:
- Refrigeration: Store the tarts in an airtight container inside the refrigerator at least three days. Shells of tarts stay crisp and the filling will remain creamy.
- Freezing The tarts may be stored in the freezer, but they’re best eaten fresh. If you decide to keep them in the freezer, place their contents within an airtight containers. let them thaw overnight in the refrigerator prior to serving.
Frequently Asked Questions (FAQs) for Mini Butterscotch Tarts
1. Do I have to make these tarts in advance?
Yes! You can prepare your crust, butterscotch and filling ahead of time. You can assemble the tarts by adding the sauce and whipped cream prior to serving.
2. What can I do to replace the mix with butterscotch?
You can replace this mix with vanilla to create an alternative flavor, however it won’t be as intense butterscotch flavor.
3. What can I do to stop my whipped-cream from inflating?
Make sure you whip the cream into stiff peaks, then refrigerate it until you’re ready use it. Be careful not to overmix, as it can cause it to split.
4. Can I prepare these tarts ahead of time?
The tarts can be made one day in advance, however it is best to serve the topping made of whipped cream and butterscotch drizzle just prior to serving.
Related Recipes for Mini Butterscotch Tart Lovers
If you are a fan of the miniature Butterscotch Cream Tarts, you might also love these recipes that are similar to them:
- Butterfinger Caramel Crunch Fudge Recipe: Easy Holiday Dessert
- Cherry Garcia Fudge Recipe – Decadent Chocolate Dessert
Conclusion
Thank you for taking part in creating this mini Butterscotch Cream Tarts! If you’re hosting a dinner party or just satisfy your sweet tooth they are sure to become a hit. With their butterscotch-y delicious filling, a buttery crust and creamy whipped topping these tarts are truly an delight. I’d love to know what turned out your way, and don’t hesitate to comment on your experience or any modifications you’ve made in the recipes. Enjoy baking and have fun!
Print
Mini Butterscotch Tarts Recipe – Easy Dessert for Parties
Description
Hello, sweet tooths and dessert enthusiasts! If you love indulging in the sweet, rich flavors of butterscotch, you’re in for a real treat today. These Mini Butterscotch Tarts are a delightful combination of buttery, creamy filling and a crispy graham cracker crust that is simply irresistible. Whether you’re hosting a gathering, preparing for a special event, or simply craving a sweet bite, these adorable tarts are sure to impress. In this recipe, I’ll show you how to create these easy yet decadent Mini Butterscotch Cream Tarts that will have your taste buds singing with joy.
Let’s get started and bake something truly delicious!
Ingredients
- 1 ½ cups graham cracker crumbs – For the buttery tart crust.
- ½ cup unsalted butter, melted – To bind the crumbs together and create a crispy texture.
- 1 package (3.4 oz) instant butterscotch pudding mix – This will form the base of the smooth, rich filling.
- 2 cups cold milk – To activate the pudding mix and give it the creamy texture.
- 1 cup heavy whipping cream – To make the whipped topping that goes on top of the tarts.
- 2 tablespoons powdered sugar – For sweetening the whipped cream.
- 1 teaspoon vanilla extract – To enhance the flavor of the whipped cream.
- Butterscotch sauce – For drizzling over the top of the finished tarts for extra richness.
- Whipped cream – For topping the tarts.
Substitution Ideas:
- If you’re gluten-free, you can substitute the graham cracker crumbs with gluten-free graham crackers or a different gluten-free cookie.
- For a dairy-free version, use coconut milk and a dairy-free whipped topping in place of the heavy cream and milk.
- You can use caramel sauce instead of butterscotch sauce if that’s what you have on hand!
Instructions
Step 1: Prepare the Crust
Preheat your oven to 350°F (175°C). In a mixing bowl, combine the graham cracker crumbs and melted butter. Stir until the crumbs are evenly moistened and the mixture holds together when pressed.
Step 2: Form the Tart Shells
Spoon the graham cracker mixture into the cups of a mini tart pan or muffin tin. Use the back of a spoon or your fingers to press the crumbs firmly into the bottom and up the sides of each cup to form a crust.
Step 3: Bake the Crusts
Place the mini tart pan or muffin tin in the oven and bake for 8-10 minutes, or until the crusts are golden brown and set. Once done, remove from the oven and let them cool completely on a wire rack.
Step 4: Prepare the Butterscotch Filling
In a medium bowl, whisk together the instant butterscotch pudding mix and cold milk. Continue whisking for about 2-3 minutes until the mixture thickens. Once thickened, place it in the fridge for about 10 minutes to chill.
Step 5: Make the Whipped Cream
In a separate bowl, beat the heavy whipping cream, powdered sugar, and vanilla extract until soft peaks form. This should take about 2-3 minutes with an electric mixer. Once stiff peaks form, gently fold half of the whipped cream into the chilled butterscotch pudding. This creates a light, mousse-like texture.
Step 6: Assemble the Tarts
Once the tart crusts have cooled completely, spoon the butterscotch mousse filling into each tart shell, filling them to the top.
Step 7: Add the Final Touches
Top each tart with a dollop of the remaining whipped cream and drizzle generously with butterscotch sauce.
Serve immediately, or refrigerate until ready to serve.
Notes
- Chill the Pudding: Allow the butterscotch pudding mixture to chill before folding it into the whipped cream. This step helps create a smoother, fluffier texture for your tarts.
- Crust Variations: If you don’t have graham crackers, try using crushed shortbread cookies or digestive biscuits. Both make great alternatives for the crust.
- Keep the Whipped Cream Stiff: Make sure your heavy whipping cream is very cold before whipping it, as this will help it reach stiff peaks more easily.
- Decorative Topping: For a fancier presentation, add a sprinkle of toffee bits or chopped nuts over the whipped cream for added texture and flavor.