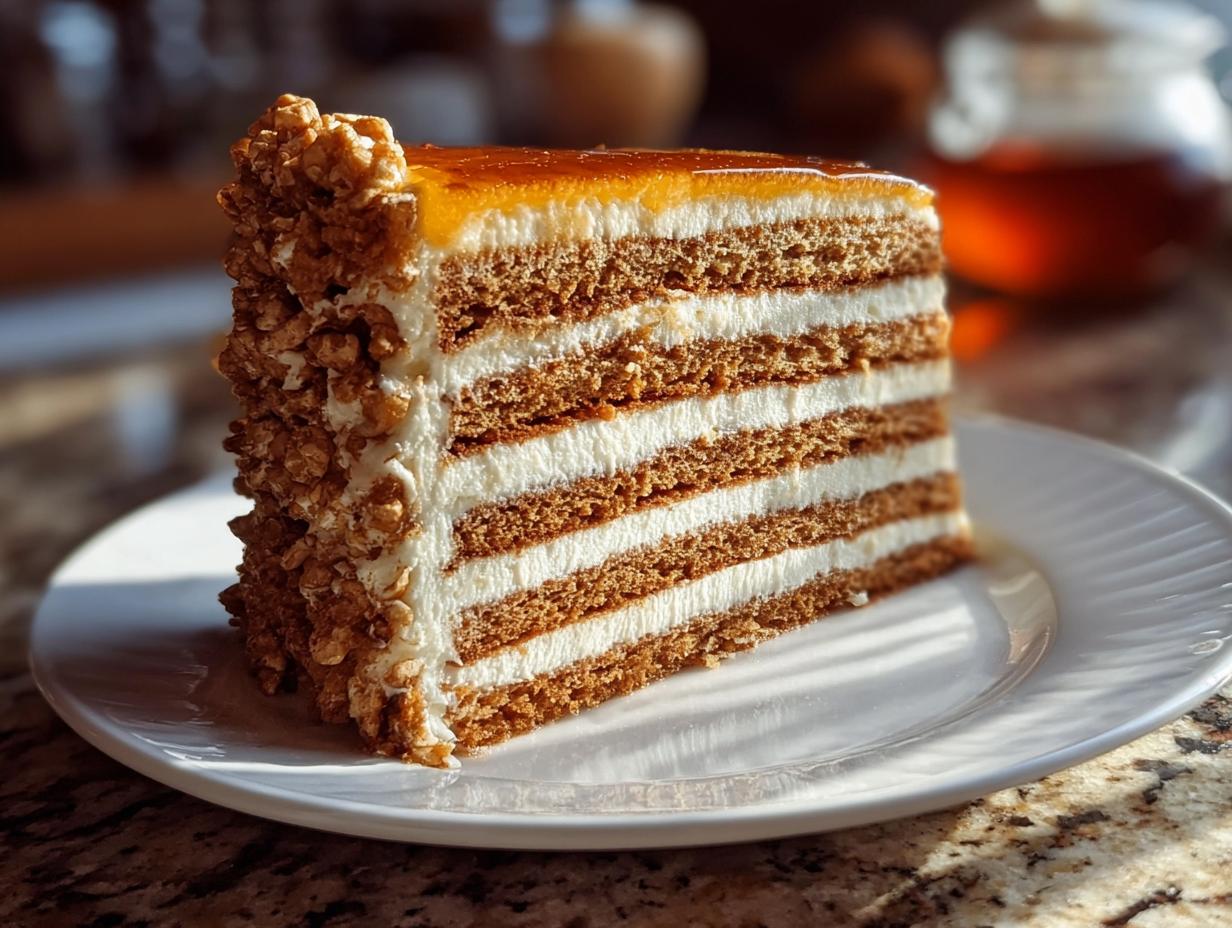
Irresistible Russian Honey Cake has been a centerpiece at my family gatherings for as long as I can remember. It’s more than just a dessert; it’s a tradition, a comforting aroma that fills the house with warmth and sweetness. I’ve always loved the delicate layers of this classic Medovik recipe, each one infused with rich honey and separated by a light, creamy frosting. Making this layered Russian honey cake brings back so many fond memories, from helping my mom spread the cream to the sheer joy of that first bite. It’s a labor of love, but trust me, the result is absolutely worth it. Let’s get cooking!
Why You’ll Love This Irresistible Russian Honey Cake
There are so many reasons why this cake is a showstopper! You’ll adore its delicate balance of sweet and slightly tangy flavors, making it incredibly appealing. Plus, it’s surprisingly manageable for a home baker.
- Incredible Taste: Experience a symphony of honey-infused cake layers and creamy frosting that melts in your mouth.
- Manageable Prep Time: While it has layers, it’s a surprisingly easy Russian honey cake to put together, perfect for busy schedules.
- Impressive Presentation: The beautiful, tall, layered structure makes it a stunning centerpiece for any celebration.
- Budget-Friendly: Most ingredients are pantry staples, making this an affordable way to create a special dessert.
- Family Favorite: Kids and adults alike adore this sweet treat, making it perfect for family gatherings.
- Authentic Experience: This recipe follows the traditional methods for an authentic Russian honey cake, offering a true taste of this classic dessert.
- Rewarding Process: The satisfaction of creating this beautiful cake from scratch is immense.
Ingredients for Authentic Russian Honey Cake
Gathering the right Russian honey cake ingredients is the first step to creating this showstopper. The honey is key, of course, infusing each layer with its signature warmth. We’ll also need basic pantry staples to create the delicate cake layers and the luscious cream filling that makes this dessert so special.
- 3 cups all-purpose flour – the base for our tender cake layers
- 1 cup granulated sugar – for sweetness in the cake batter
- 1/2 cup unsalted butter, softened – adds richness and helps bind the batter
- 1 cup honey – the star ingredient, choose a good quality one for the best flavor
- 1 teaspoon baking soda – helps the cakes rise and creates a slight chewiness
- 3 large eggs – bind the ingredients and add structure
- 1 teaspoon vanilla extract – enhances the overall flavor profile
- 2 cups heavy whipping cream – for the creamy, dreamy frosting
- 1/2 cup powdered sugar – to sweeten the whipped cream
How to Make Russian Honey Cake from Scratch
Get ready to embark on the delightful journey of how to make Russian honey cake! This process, while requiring a bit of patience, is incredibly rewarding. Follow these steps for a truly authentic experience.
- Step 1: Preheat your oven to 350°F (175°C). Line several round baking pans with parchment paper – I usually use three or four 8-inch pans to get thin layers. This ensures even baking for our Russian honey cake preparation.
- Step 2: In a microwave-safe bowl, combine 1 cup honey, 1 cup granulated sugar, and 1/2 cup unsalted butter, softened. Microwave for about 1 minute, stirring until the butter is completely melted and everything is well combined. The aroma at this stage is already heavenly!
- Step 3: Whisk 3 large eggs in a separate bowl until they become frothy. Gently pour the frothy eggs into the warm honey mixture, whisking continuously to incorporate them smoothly.
- Step 4: In another bowl, whisk together 3 cups all-purpose flour and 1 teaspoon baking soda. Gradually fold this dry mixture into the wet ingredients until just blended. Be careful not to overmix; you want a tender cake.
- Step 5: Divide the batter evenly among your prepared baking pans. You should aim for thin, even layers for the best texture.
- Step 6: Bake for 10-12 minutes, or until a toothpick inserted into the center comes out clean. The edges will be lightly golden. Let them cool in the pans for a few minutes before carefully transferring them to a wire rack to cool completely.
- Step 7: While the cakes cool, whip 2 cups heavy whipping cream and 1/2 cup powdered sugar in a large mixing bowl until soft peaks form. The cream should be thick but still pliable for spreading.
- Step 8: Once the cake layers are completely cool, it’s time for assembly! Place one cake layer on your serving platter. Spread a generous layer of the whipped cream over it. Continue layering cake and cream until all layers are stacked. This is a crucial part of making a beautiful layered Russian honey cake.
- Step 9: Cover the entire cake well and refrigerate for at least 4 hours, or ideally overnight. This chilling time is essential for the flavors to meld and the cake to set properly, ensuring a delightful bite every time.
Pro Tips for the Best Layered Russian Honey Cake
I’ve learned a few tricks over the years to make sure my Irresistible Russian Honey Cake turns out absolutely perfect every single time. These tips will help you achieve that beautiful texture and flavor that everyone raves about.
- Measure your flour accurately: Spoon the flour into your measuring cup and level it off. Too much flour can lead to dry layers.
- Don’t overbake the layers: They are meant to be thin and slightly flexible. Overbaking makes them brittle and harder to assemble.
- Chill the cake thoroughly: This step is crucial. It allows the layers to soften from the cream and the flavors to meld beautifully.
- Use a cake ring for assembly: For a super neat presentation, place a cake ring around the bottom layer and build up inside it.

What’s the secret to perfect Russian honey cake texture?
The real secret is patience and allowing the cake to rest overnight. This lets the thin, baked honey layers absorb moisture from the creamy frosting, resulting in that signature tender and moist Russian honey cake texture. For more baking tips, check out these latest recipes.
Can I make Russian honey cake ahead of time?
Absolutely! In fact, it’s highly recommended. You can assemble the cake a day in advance and store it covered in the refrigerator. This gives the flavors time to meld and the layers to soften perfectly. If you’re looking for other make-ahead desserts, consider these chocolate cream cheese danish.
How do I avoid common mistakes with Russian honey cake?
A common pitfall is overmixing the batter, which can make the layers tough. Also, be careful not to overbake them – they should be just set. Finally, ensure your cream is whipped to soft peaks, not stiff, for easy spreading. For more baking advice, you might find this guide on DIY sugar scrub natural recipes helpful for understanding ingredient preparation.
Best Ways to Serve Your Homemade Russian Honey Cake
This beautiful cake is a star on its own, but I love pairing it with simple accompaniments that complement its rich, honeyed flavor. Serving it just right enhances the entire experience of this sweet Russian honey cake.
- Fresh Berries: A handful of fresh raspberries or a small scoop of blueberries adds a lovely tartness that cuts through the sweetness beautifully.
- Vanilla Bean Ice Cream: A scoop of creamy vanilla ice cream alongside a slice of warm honey cake is pure bliss. The contrast in temperature and texture is divine.
- Whipped Cream Dollop: Sometimes, a simple extra dollop of unsweetened whipped cream is all you need to add an extra layer of richness.

Nutritional Information for a Slice of Russian Honey Cake
Here’s a breakdown of what you can expect in a typical slice of this delightful dessert. It’s a rich treat, perfect for special occasions.
- Calories: 350
- Fat: N/A
- Saturated Fat: N/A
- Protein: N/A
- Carbohydrates: N/A
- Fiber: N/A
- Sugar: N/A
- Sodium: N/A
Nutritional values are estimates and may vary based on specific ingredients used in your Irresistible Russian Honey Cake.
How to Store and Reheat Your Medovik Recipe Cake
Once your beautiful Irresistible Russian Honey Cake has cooled and been assembled, proper storage is key to preserving its incredible texture and flavor. I’ve found that the best way to keep it tasting fresh is to ensure it’s well-covered.
- Cool Completely: Always let the cake cool entirely before attempting to store it. Warm cake can create condensation, making it soggy.
- Airtight Container: Transfer the assembled cake to an airtight container. If you don’t have one large enough, carefully wrap the entire cake in plastic wrap, followed by a layer of aluminum foil. This is crucial for storing the cake effectively.
- Refrigeration: Store the cake in the refrigerator for up to 3-4 days. The chilling time really helps the flavors meld and the cake layers soften beautifully.
- Freezer Storage: If you need to store it for longer, you can freeze individual slices wrapped tightly in plastic wrap and then foil for up to 3 months.
When you’re ready to enjoy a frozen slice, thaw it overnight in the refrigerator. For a slightly warmed treat, you can gently reheat a slice in a low oven (around 250°F or 120°C) for about 5-10 minutes until just warmed through. This method works wonders for bringing back that fresh-baked goodness. For more dessert ideas, explore our apple pie dip.
Frequently Asked Questions About Irresistible Russian Honey Cake
Can I substitute the honey in this Russian honey cake recipe?
While honey is the star, you can experiment with different types! Buckwheat honey offers a richer, more robust flavor, while clover honey provides a lighter, floral note. Just ensure you use the same quantity. The quality of your honey makes a big difference in the final taste of your Irresistible Russian Honey Cake. For more ingredient tips, consider our oatmeal apple recipe.
What’s the best cream to use for the Russian honey cake frosting?
For that classic, luscious filling, heavy whipping cream with a high fat content (35% or more) is ideal. It whips up beautifully and creates a stable layer that holds its shape. Make sure it’s very cold when you whip it for the best results. This ensures a smooth and delicious Russian honey cake frosting.
Can I make the layers of my homemade Russian honey cake gluten-free?
Yes, you can! To make your homemade Russian honey cake gluten-free, you’ll need to use a good quality gluten-free all-purpose flour blend that contains xanthan gum. You might need to adjust the liquid slightly, as gluten-free flours can absorb moisture differently. Bake them for the same amount of time, watching closely. For other gluten-free options, check out our easy gluten-free crab cakes.
How do I get my cake layers perfectly even for assembly?
The key to perfectly even layers for your Irresistible Russian Honey Cake is to divide the batter as evenly as possible between your prepared pans. Using a kitchen scale can help ensure each pan has the same amount of batter. If your layers bake up with domes, you can gently trim them while they’re still warm!
Variations of Russian Honey Cake You Can Try
While the classic Irresistible Russian Honey Cake is truly divine, there are so many fun ways to put your own spin on this beloved dessert! Exploring these variations can lead you to discover new favorite versions of this rich Russian honey cake.
- Chocolate Medovik: Add a few tablespoons of unsweetened cocoa powder to the flour mixture for a decadent chocolate-infused cake. The chocolate and honey combination is surprisingly delicious.
- Berry Medovik: Fold fresh or frozen berries (like raspberries or blueberries) into the cream filling for a burst of fruity flavor and a beautiful color contrast.
- Gluten-Free Russian Honey Cake: Easily adapt this recipe by using a high-quality gluten-free all-purpose flour blend. You might need to slightly adjust the liquid, so keep an eye on the batter consistency.
- Caramel Honey Cake: Drizzle a bit of caramel sauce between the layers along with the cream for an extra layer of sweetness and a delightful caramel flavor that pairs wonderfully with honey.

Irresistible Russian Honey Cake That Wows
- Total Time: 1 hour 30 minutes
- Yield: 10 servings 1x
- Diet: Vegetarian
Description
Learn how to make an irresistible Russian honey cake, also known as Medovik. This dessert features layers of honey-infused sponge cake and a luscious cream filling, perfect for any special occasion. It’s a sweet, moist, and rich treat that’s surprisingly easy to prepare.
Ingredients
- 3 cups all-purpose flour
- 1 cup granulated sugar
- 1/2 cup unsalted butter, softened
- 1 cup honey
- 1 teaspoon baking soda
- 3 large eggs
- 1 teaspoon vanilla extract
- 2 cups heavy whipping cream
- 1/2 cup powdered sugar
Instructions
- Preheat your oven to 350°F (175°C). Line several round baking pans with parchment paper.
- Combine honey, sugar, and butter in a bowl. Microwave for about 1 minute, mixing until the butter melts.
- Whisk eggs in a separate bowl until frothy, then mix them into the honey mixture.
- Combine flour and baking soda in another bowl. Gradually fold this mixture into the wet ingredients until just blended. Do not overmix.
- Divide the batter evenly among the prepared pans.
- Bake for 10-12 minutes, or until a toothpick inserted in the center comes out clean. Let them cool completely.
- Whip heavy cream and powdered sugar in a large mixing bowl until soft peaks form.
- Once the cakes have cooled, place one layer on a serving platter and spread a layer of whipped cream over it. Continue layering cake and cream until all layers are assembled.
- Cover the cake and refrigerate for at least 4 hours (or overnight) to set properly before serving.
Notes
- Use high-quality honey for the best flavor.
- Allow the cake to chill for at least 4 hours for flavors to meld and texture to improve.
- Serve with fresh berries or vanilla ice cream for an enhanced experience.
- Prep Time: 30 minutes
- Cook Time: 12 minutes
- Category: Dessert
- Method: Baking
- Cuisine: Russian
Nutrition
- Serving Size: 1 slice
- Calories: 350
- Sugar: N/A
- Sodium: N/A
- Fat: N/A
- Saturated Fat: N/A
- Unsaturated Fat: N/A
- Trans Fat: N/A
- Carbohydrates: N/A
- Fiber: N/A
- Protein: N/A
- Cholesterol: N/A